King Brad
This week I got the privilege to build a real computer instead of simply putting together a theoretical system. This little build is something that would be a great console replacement and an excellent entry level gaming PC. This setup cost my friend Brad, the new owner, right around $270. That may seem extremely low and that is due to having roughly half of these parts in my closet collecting dust. A rough estimate of this computer brand new would be in the $550-$600 price bracket.

CPU: AMD Athlon X4 760K Black Edition

The processor in this computer is the AMD Athlon X4 760K. It is a quad-core CPU with a 3.8 Ghz stock clock. This chip is very similar to AMD's APU line besides the fact that it doesn't have integrated graphics. That means that you NEED to have a graphics card to pair with this CPU, but you aren't paying a premium for the extra features. Coming in at around $90 this is a great processor to get started in the gaming world!

Motherboard: Gigabyte GA-F2A88X-UP4
The main board was chosen by Brad and I can concur that he made an excellent choice. This board by Gigabyte is classy, sexy, and feature loaded. AMD has been pushing away from the AM3+ socket and driving all of their efforts towards the FM2+ socket. This board being that same socket should have great expandability in the future.

This motherboard features crossfire and SLi support, 4 RAM slots, 7 SATA ports (6Gb/s), full overclocking capability, diagnostic read-outs, and power/reset buttons for test bench setups. The red heatsinks on this board are not only huge for cooling potential, but also very eye catching. This board comes with a $110 price tag. For all of these features, it's practically stealing!
RAM: Avexir Core Series 8 GB
The memory for this computer were also chosen by Brad. The Avexir Core Series kits are very unique. They are some of the only kits that have LEDs built right into the DIMM. This particular model pulses with while light. Since the case for this build has a window the RAM looks very nice. 8 GBs will be plenty for gaming and multitasking at the same time!

Storage: Western Digital Caviar Blue 1TB
For the main drive I was able to reuse the old drive that was in his previous machine. Being a very popular 7200 RPM, 1TB drive I had no problems doing a reformat and install of Windows 8 Pro. You may laugh at the position of the drive, but fear not. The drive is secured to the bottom of the case with Velcro strips. Velcro works well for this type of thing, because it's sturdy, but also reduces vibrations sent from the drive to the case.

When I used this case for my own computer I removed the entire hard drive cage with some trusty power tools to increase the front airflow intake. Once removed it is hard to re-install the drive cage, so I made due with what I had on hand. Brad, being a gifted artist is going to create a panel to cover the drive's circuitry so that it doesn't collect dust.
GPU: PowerColor 7770 Ghz. Edition
This graphics card had been building up dust in my closet for quite a few months. I'm happy knowing that it is going to be put to good use! The 7770, coming in at around $100, has a great performance/dollar ratio. While it is not going to have amazing performance at 1080p, turning a few settings to high/medium and the resolution down to 720p or 900p will yield very promising results.

I was able to spend extra time with this computer and run it through a few synthetic benchmark utilities. These programs create graphically intense situations and are a great way to compare your system against someone else or to see how certain settings hinder your performance. The two main programs that I like to use are Unigine Valley and Unigine Heaven. I ran these tests at completely stock clocks to simulate a low level user.
Valley: Graphics setting set to High, AA off
- 1080p: 28.1 FPS - 1178 score
- 900p: 37.2 FPS - 1556 score
- 720p: 49 FPS - 2052 score
Heaven: Graphics setting set to High, AA and Tessellation off
- 1080p: 27 FPS - 679 score
- 900p: 39.4 FPS - 991 score
- 720p: 59.7 FPS - 1506 score
As you can see from these averages, 1080p is below that dreaded 30 FPS minimum. 900p and 720p on the other hand are completely playable averages. These tests also show how lowering the resolution, but keeping the graphics settings the same can really boost in game performance!
(if you have questions regarding my testing methods, I would be happy to discuss them)
PSU: Corsair CX750M
The power behind all of this hardware is a Corsair CX750M. Brad received this as a gift over Christmas. It is a 750 watt, semi-modular PSU with an 80+ Bronze efficiency rating. The system's max wattage at stock clocks is right around 300 so 750 is quite a bit more than necessary, but it does leave a lot of room for future expansion. This is a tier 3 unit. That means that while it isn't exactly a premium quality PSU, it meets all of the required standards during testing. As an added bonus the semi-modularity made cable management quick and easy!
 |
| Before Installation |
 |
| After Installation |
Case: Rosewill Blackhawk Mid-Tower
The Blackhawk has been sitting in my closet for over 6 months. When I used this case as my primary system holder it worked well and functioned as needed, until I wanted to upgrade to liquid cooling. Even though the top supports two 140mm fans, a 280mm radiator WILL NOT fit in push nor pull. After a good amount of modding and still being unable to get the radiator to mount, I got a new case.

If you compare this image to the final picture you will notice that I removed the hard drive cage in the bottom right half of the case. That helped increase the direct airflow across my graphics cards. The case features lots of rubber grommets for routing cables to the back as well as a hot swap bay on the top panel for easy hard drive testing.
Cable Management
Easily my favorite and most rewarding part of building a PC is routing the cables just right, so that your case looks presentable and air can move through your case properly. Starting at the top left of the case there is a small hole for the top fan and CPU power cable.

Moving to the right of the board you see the 24 pin motherboard power cable as well as the USB 3.0 front panel cable. This port has ON/OFF support so that even when your computer is off, you can still charge your phone or other device using that port.

Moving down the board you see a SATA cable for the hard drive and a 6 pin PCI-Express cable for the graphics card's power. Just below them are the dual BIOS chips as well as the LED diagnostic readout.
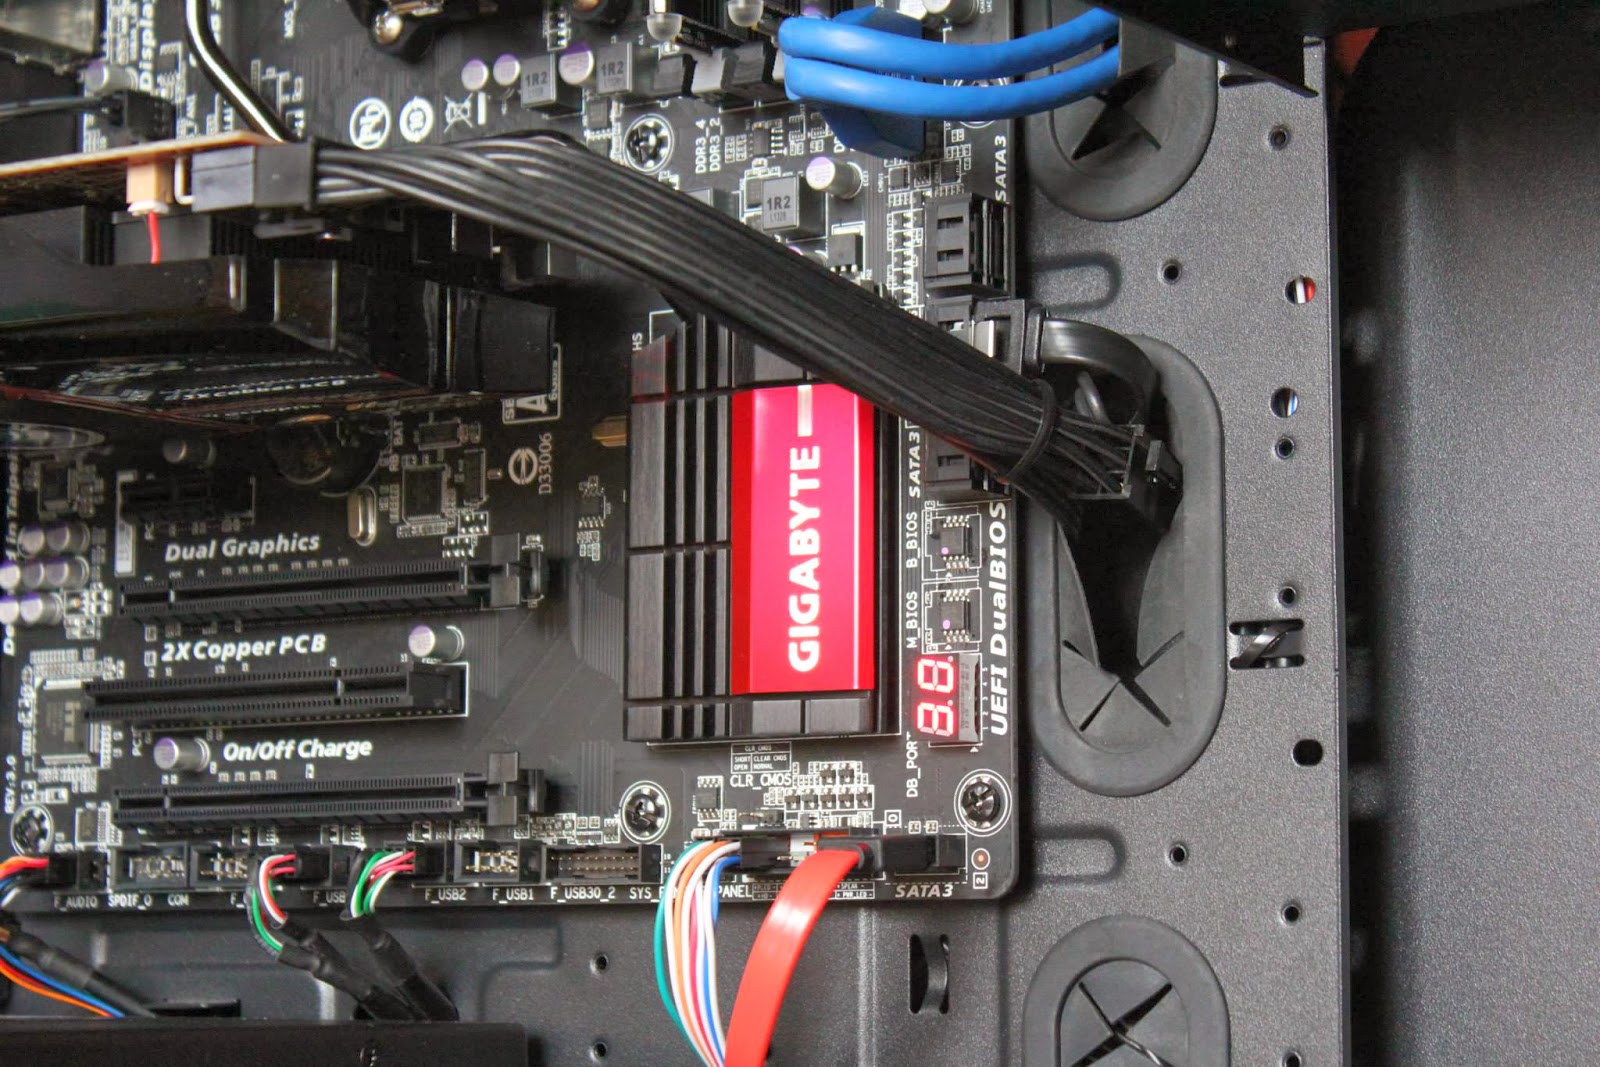
For the bottom connectors moving from right to left: SATA hot swap, front panel power/reset, front panel USB 2.0 x2, and HD Audio cables. I don't think that any of these holes were designed for routing cables, but I like to get creative. My goal is to make the inside of a case look as good as humanly possible.

 |
| The finished product |
In case you didn't notice there are no intake fans. After extensive stress testing the temperatures were way within the norm, but in order to keep dust build up to a minimum there will be two 120mm Cooler Master Sickle Flows mounted to the right of the hard drive. They will not only lower temps even more, they will also even out the internal pressure. These fans were ordered late and since Brad and I don't live very close he will have to install them on his own when they come in. So for the time being, imagine two nice fans blowing cool air inside the case.
As an avid PC builder I refuse to have poor cable management. When I show the new owner the inside of their computer their eyes light up and I get a huge sense of accomplishment. I feel that it is my attention to little details that sets me apart from other builders. Many of the computer building companies offer professional cable management options for a higher cost. I only have one kind of cable management. The best, every time.
This is an example of poor cable management.
This makes my skin crawl...
My work looks pretty good now doesn't it? :)
I've you've made it this far, thank you for at least browsing the pictures! If there was something here that you particularly liked, let me know. If there was something that you want to know more about, feel free to ask questions, I would be happy to answer!
No comments:
Post a Comment